Galaxy Watercolor Technique
Thank you for all the great comments and e-mails about the Galaxy Watercolor cards that I shared yesterday! I am so glad you all loved this fun technique as much as I do!

Here's the two cards I shared again with this awesome technique. I have a few pictures to show you how I did this technique with Stampin' Up! products. I want to give a shout out to Wendy Cranford who shared this idea on her blog.
Let's get started! You will need the following:
Product List

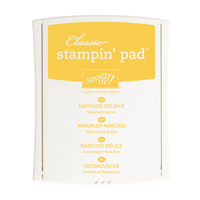
Lay out your watercolor paper and make sure your aqua painter is full of water, you will need it plus more! On the left side of the watercolor paper you can see the first layer of color that I made. Take your ink pads, one by one and add splotches of color all over the paper. Try not to have the colors bleed too much, you don't want to muddy your nice bright colors. You will cover the entire page with color splotches of Melon Mambo, Daffodil Delight, Bermuda Bay, Pacific Point and Rich Razzleberry. With each of the ink pads, transfer color to the lid and add color to the watercolor paper with the aqua painter.
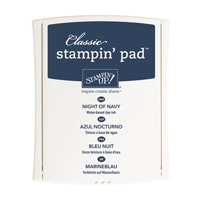
Once all of the colors are down on the paper, you will start in with the Night of Navy ink OVER TOP. You want to add a drop or two of re inker to the lid of the Night of Navy ink pad, you will need lots of color. I added quite a bit of water to the lid as well so the ink will flow over the watercolor paper. NOTE: Before you add this layer of Night of Navy, make sure your paper is dried from the first layer of color.

Add Night of Navy ink with the aqua painter over your splotches of color leaving some areas darker than others. I actually added TWO layers of navy, letting the first layer of color dry well before adding the second. That's how I got the nice dark galaxy look that still has a little color showing through.
Once your paper is dry, you will be at the last step. Get a little bit of Whisper White craft ink in the lid of you ink pad. Add a little water and use a regular paint brush to splatter white spots over the paper. This completes the galaxy look.

Now you are ready to cut up you paper into the pieces you will need for you cards. I hope you'll give this a try, it is a really cool technique! You can see the video that I watched by Wendy Cranford. Just use Night of Navy ink for the one step that she used black watercolor ink. Please let me know if you have any questions and I would love to see what you create!

Did you know that I did SHOOTING STAR for my card set in the June Mini Session from Create with Connie and Mary?? Yep, 4 cards with this awesome set. AND, guess what’s already been released that you should check out……….the AUGUST MINI SESSION! We have 5FULL TUTORIALS for you with new stamps from the Annual Catalog PLUS a BONUS card set with the upcoming holiday set STAR OF LIGHT.

To find out more information and to subscribe, please visit CREATE WITH CONNIE AND MARY. I hope you’ll join us!


Follow my blog with Bloglovin
Here's the two cards I shared again with this awesome technique. I have a few pictures to show you how I did this technique with Stampin' Up! products. I want to give a shout out to Wendy Cranford who shared this idea on her blog.
Let's get started! You will need the following:
Product List
Lay out your watercolor paper and make sure your aqua painter is full of water, you will need it plus more! On the left side of the watercolor paper you can see the first layer of color that I made. Take your ink pads, one by one and add splotches of color all over the paper. Try not to have the colors bleed too much, you don't want to muddy your nice bright colors. You will cover the entire page with color splotches of Melon Mambo, Daffodil Delight, Bermuda Bay, Pacific Point and Rich Razzleberry. With each of the ink pads, transfer color to the lid and add color to the watercolor paper with the aqua painter.
Once all of the colors are down on the paper, you will start in with the Night of Navy ink OVER TOP. You want to add a drop or two of re inker to the lid of the Night of Navy ink pad, you will need lots of color. I added quite a bit of water to the lid as well so the ink will flow over the watercolor paper. NOTE: Before you add this layer of Night of Navy, make sure your paper is dried from the first layer of color.
Add Night of Navy ink with the aqua painter over your splotches of color leaving some areas darker than others. I actually added TWO layers of navy, letting the first layer of color dry well before adding the second. That's how I got the nice dark galaxy look that still has a little color showing through.
Once your paper is dry, you will be at the last step. Get a little bit of Whisper White craft ink in the lid of you ink pad. Add a little water and use a regular paint brush to splatter white spots over the paper. This completes the galaxy look.
Now you are ready to cut up you paper into the pieces you will need for you cards. I hope you'll give this a try, it is a really cool technique! You can see the video that I watched by Wendy Cranford. Just use Night of Navy ink for the one step that she used black watercolor ink. Please let me know if you have any questions and I would love to see what you create!
Did you know that I did SHOOTING STAR for my card set in the June Mini Session from Create with Connie and Mary?? Yep, 4 cards with this awesome set. AND, guess what’s already been released that you should check out……….the AUGUST MINI SESSION! We have 5FULL TUTORIALS for you with new stamps from the Annual Catalog PLUS a BONUS card set with the upcoming holiday set STAR OF LIGHT.

To find out more information and to subscribe, please visit CREATE WITH CONNIE AND MARY. I hope you’ll join us!
CLICK HERE to SHOP anytime and earn FREE STAMPS
SHOP the CLEARANCE RACK and WEEKLY DEALS
CLICK HERE to shop TUTORIALS FOR SALE
Follow my blog with Bloglovin


Oh my! This is GORGEOUS!!! Thanks for sharing how you did it! :)
ReplyDeleteThanks so much for this. I love your look using the Night of Navy rather than black that Wendy used.
ReplyDeleteNicole! Thanks for sharing your tutorial and the link to the video. Having the SU! ink colors is a big help too! Not seeing either yours nor Wendy's in person, I think the Night of Navy looks more real, but both are awesome. TFS!
ReplyDelete